Mender blog

For a while now the Raspberry Pi 4 has been out and while at first I was waiting for the delivery it took some time until I got actually started with this. As this was my very first attempt at a "IoT device", it might be helpful to first get some background on my motivation...
Prelude
Our home music is usually consumed through Spotify rendered on our nice Vifa Oslo or for the smallest member of the family through a Toniebox. Additionally there is a dated analog music setup, for vinyls and some child classics on cassettes. From time to time the incredible dire situation arrives, where the cassettes, vinyls and currently available sound figures won't fit the "taste du jour" - but instead it has to be that one particular audio play or song. And all while there is a concurrently executing working session, that just works so much better with the right music playing. So the concurrent access to the single streaming target becomes an urgent problem, if you don't want to compromise on sound quality and revert to phone speakers (and why should you while 2 more than capable speaker systems already exist in the room). For a while this would be possible to solve by using the 3.5mm audio jack and just stream this, then along came a new phone, its USB-C connector and a soon broken adapter. So.. buy new Bluetooth speakers? Again: why should you while 2 more than capable speaker systems already exist in the room (with one of them easily transportable). Let's "upcycle" the unused ports on the good old Technics receiver and attach a Raspberry instead, hide it behind the shelves and don't worry about it anymore. The timing was good as a new version was just released - mostly good that is, as I've spent 3 months waiting for the order (+ am still waiting for the case), luckily a spare micro SD-card was a lot easier to find.
Building it
What might be missing as additional context: due to my time being spent mostly on frontend development, I don't just not want to touch the Raspberry too often, but also don't really want to work on device through SSH or even a UI (that HDMI port sure looks a bit smaller than what you usually get) + the only detachable keyboard I have would need a teardown and proper re-assembly to plug into any of the various Raspberry ports. With that said let's dive into the first steps to get anything working on the Raspberry... (you may want to skip this if you have one set up already).
Initial setup & a shell
To provide a base layer of things to work with I'll just get the image straight from the Raspberry source, as for now I don't want to examine any "3rd" party images to run in my living room. Flash it according to the official instructions for your OS - my case that was:
diskutil list
sudo diskutil unmountDisk /dev/disk<disk# from diskutil>
sudo dd bs=1m if=2019-09-26-raspbian-buster-lite.img of=/dev/rdisk<disk# from diskutil> conv=sync
So listing the connected storage devices, and their volumes, picking the one from my SD-card, unmounting that one and writing the untouched image straight to it. Followed by an additional command to get the device connected to your network another set of things to execute:
cat >/Volumes/boot/wpa_supplicant.conf <<EOF country=<YOUR-COUNTRY-CODE> ctrl_interface=DIR=/var/run/wpa_supplicant GROUP=netdev update_config=1 network={ ssid="<YOUR-SSID>" psk="<YOUR-PASSWORD>" } EOFAs well as yet another one to get SSH (remember: I had no keyboard/ HDMI adapter around to get anywhere on the device otherwise) to open up:
touch /Volumes/boot/sshAnd at last we can eject the SD-card...
sudo diskutil eject /dev/rdisk<disk# from diskutil>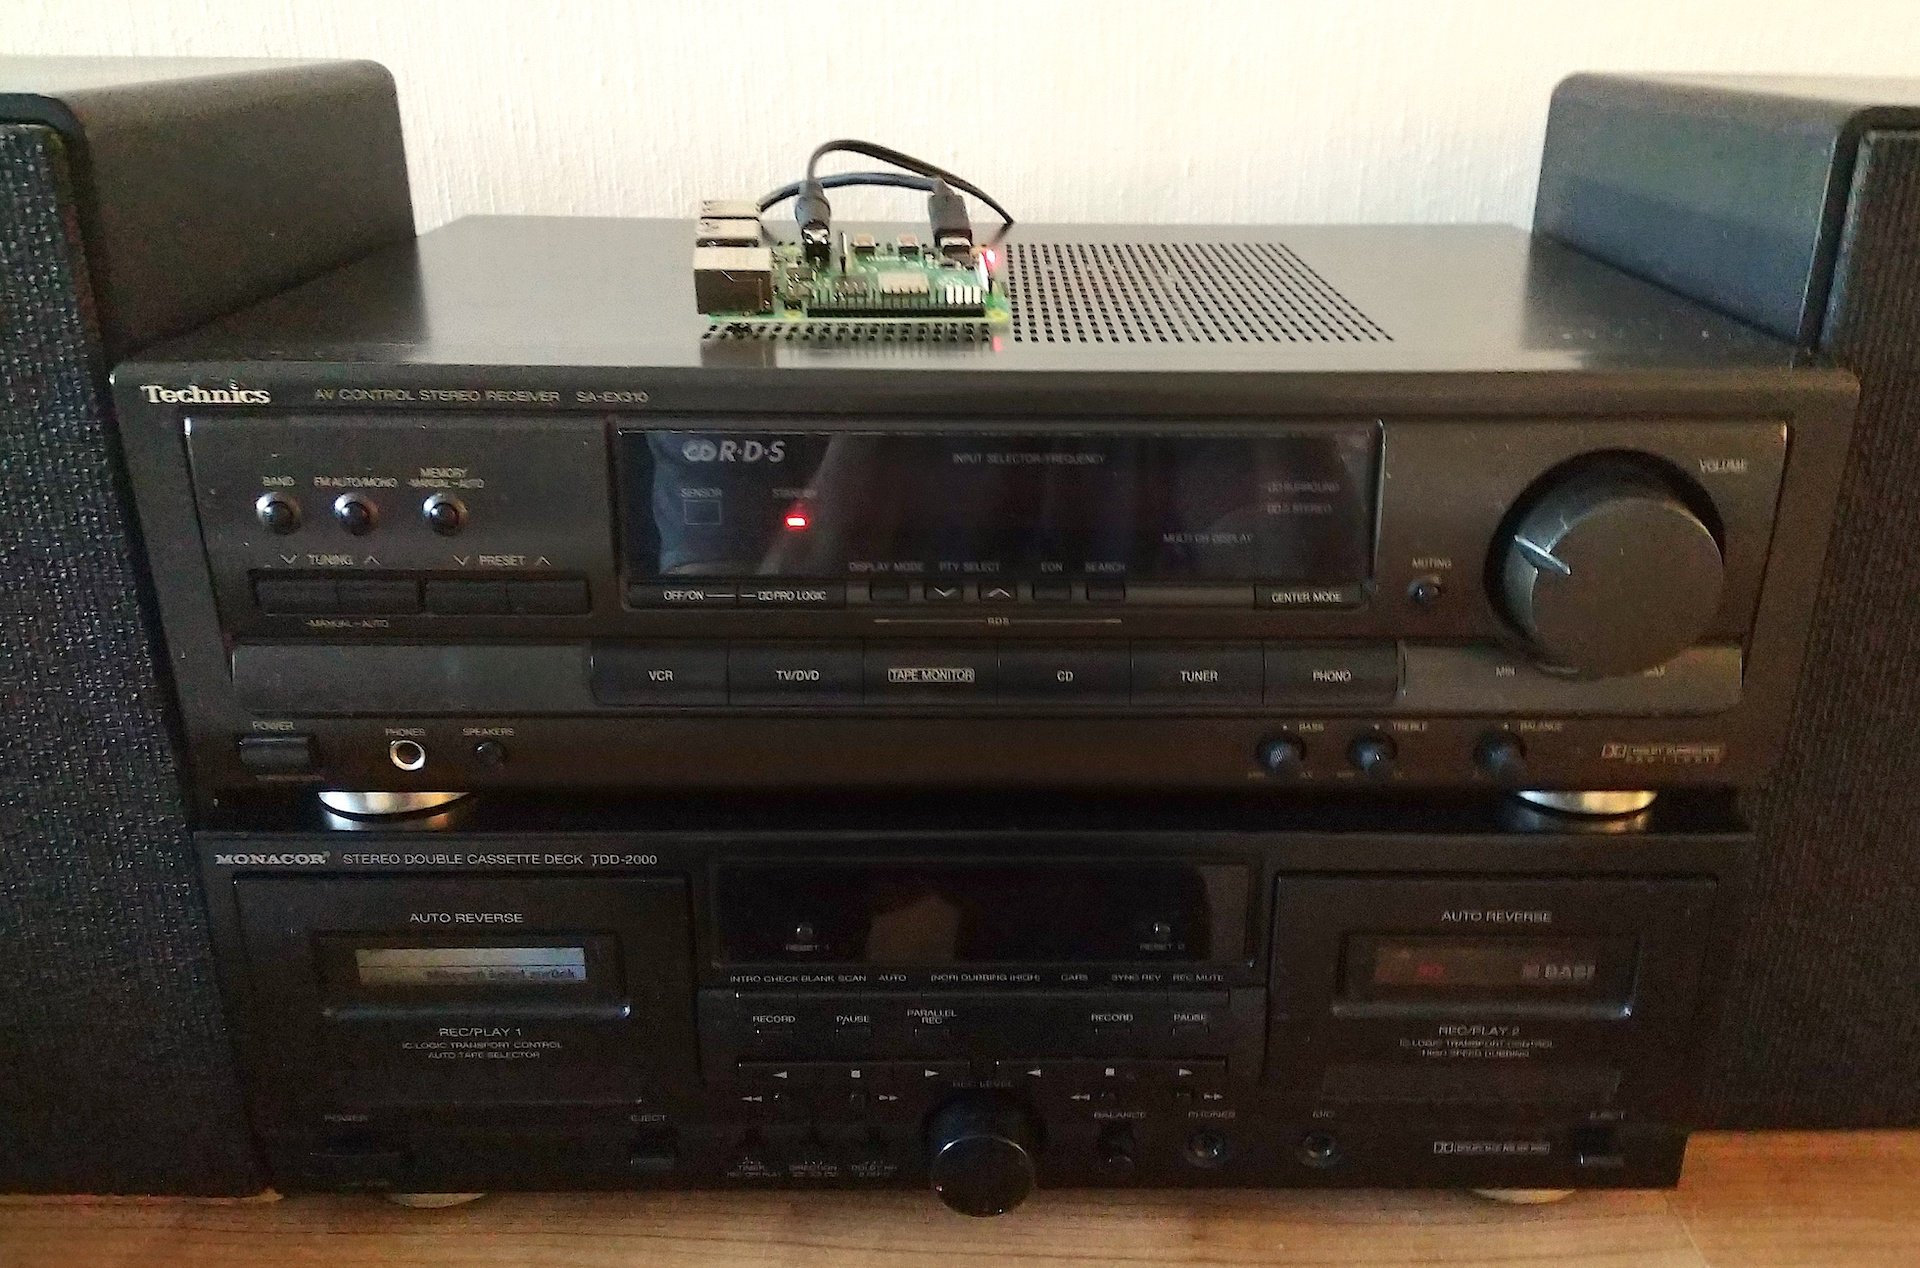 the connected Raspberry Pi - not hidden yet Now plugging in that SD-card, as well as the 3.5mm and USB-C cable, stow it out of sight behind the audio receiver, somehow find out the IP of the Raspberry and connect through regular SSH:
ssh pi@<some.ip.addr.ess>The actual work pt.1 - integrating Mender
Given that there are several ways to deploy new functionality or config changes to your device, I chose to use Mender - so the one we are working on here at Northern.tech. Since it is pretty easy and very flexible to get things deployed with Mender and to just eat a bit of the dog food we are cooking. To minimize the contact to that previously opened shell I went to my Mender account and went through the onboarding using my Raspberry Pi 4. The most important command out of said onboarding is probably:
bash -c 'wget https://d1b0l86ne08fsf.cloudfront.net/master/dist-packages/debian/armhf/mender-client_master-1_armhf.deb dpkg -i mender-client_master-1_armhf.deb cp /etc/mender/mender.conf.demo /etc/mender/mender.conf TENANT_TOKEN="'<YOUR-TENANT-TOKEN'" sed -i "s/Paste your Hosted Mender token here/$TENANT_TOKEN/" /etc/mender/mender.conf mkdir -p /var/lib/mender echo "device_type=raspberrypi4" | tee /var/lib/mender/device_type systemctl enable mender && systemctl restart mender'which has to be pasted on the PIs SSH shell and a few seconds later the Raspberry should appear in the devices list. And that should be it for ondevice- or SSH-shell interactions. Finally I'm back in the safe zone that is my trusty editor.
The actual work pt.2 - creating an update
To get the update installed I just looked around a bit on Hackernews to find a suitable project to be deployed on the Raspberry and then it was just a matter of picking a suitable Update Module. Turns out the script Update Module is just too easy to use for what I want to achieve. First step is defining what script should run, so I put the following into a file called raspotify.sh:
curl -sL https://dtcooper.github.io/raspotify/install.sh | sh
cat >/etc/default/raspotify <<EOF # Device name on Spotify Connect DEVICE_NAME="MenderingSpeaker" # Bitrate, one of 96 (low quality), 160 (default quality), or 320 (high quality) BITRATE="320" # To make your device visible on Spotify Connect across the Internet add your # username and password which can be set via "Set device password", on your # account settings, use `--username` and `--password`. # OPTIONS="--username <username> --password <password>" EOF
and uncommented the OPTIONS line together with the adjusted username and password to fit my account. With that in place, there is now just the generation of a deployable artifact left. That is then again just the following:
wget -q -O /usr/local/bin/mender-artifact https://d1b0l86ne08fsf.cloudfront.net/mender-artifact/master/darwin/mender-artifact
chmod +x /usr/local/bin/mender-artifact
ARTIFACT_NAME="raspotifyInstaller"
DEVICE_TYPE="raspberrypi4"
OUTPUT_PATH="raspotifyInstaller.mender"
SHELL_SCRIPTS="raspotify.sh"
mender-artifact write module-image -T script -n ${ARTIFACT_NAME} -t ${DEVICE_TYPE} -o ${OUTPUT_PATH} -f $(echo "$SHELL_SCRIPTS" | sed -e 's/ / -f /g')
Sidenote
Since I was (maybe a bit too) eager to get MacOS Catalina installed I had to run the following to allow executing mender-artifact during the artifact generation.
xattr -d com.apple.quarantine /usr/local/bin/mender-artifactNow back to the Mender GUI to the Releases section, upload the generated raspotifyInstaller.mender and then "Create deployment with release". A few seconds later this should show up as a target device in Spotify and we're done. 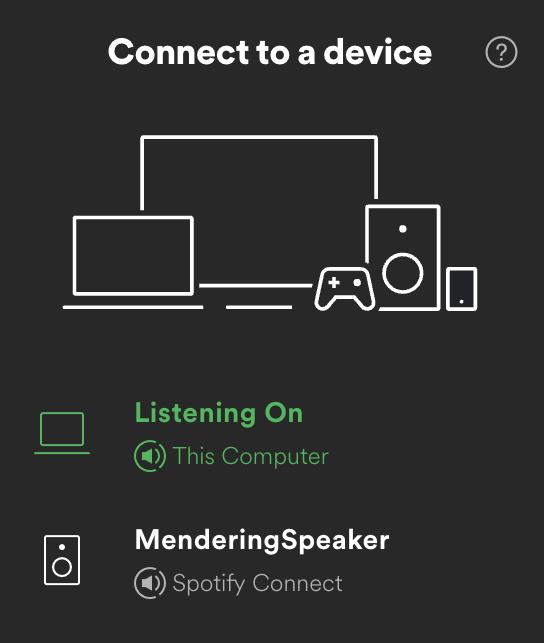 the connected Raspberry Pi showing up in Spotify
Tidying up
To wrap things up and reduce the need for me to have Mender artifact installed or maybe in the future just automatically push my modules to Mender I put everything in a nice build pipeline. You can find the project as well as the pipeline on Gitlab. There I already build additional modules, since it took just a few steps to get there, but I am not yet fully happy with the Bluetooth bridge one - so YMMV.
Wrap up
Initially I intended to start this as a proper build of a yocto based image but soon realized that this took quite a bit more of my time than I intended - so I'll keep this for a follow up blog post, to be written as soon as my memory of the frustration involved has faded. The route I took, using the .deb file as suggested in the Mender onboarding, was just a breeze and I can highly recommend giving this a try when thinking about getting OTA updates working in an orderly fashion. And now that I've got this working I can just go straight to upgrading all of the "dumb" speakers present in my surroundings :). And a last note to the project: To fix some sporadic errors I extended the raspotify.sh script to include a cron job definition and deployed another version to the Raspberry - take a look at the file in the repository if you experience similar issues.
Next steps
- wait for the case to arrive
- maybe get a better audio output device in the meantime
- peel out the Raspberry from behind the shelves
- put it into a case
- add some professional position management (aka duct tape)
.... deploy a custom yocto build
References
- https://dtcooper.github.io/raspotify/ (does the actual Spotify bridging work)
- https://gist.github.com/JeremieRapin/bc35a2632c072a082d48f5503270df16 (workaround for sporadic librespot crashes)
- https://www.raspberrypi.org/forums/viewtopic.php?t=235519 (for the Bluetooth bridge to be found in the repo)
Recent articles

New Release – Hosted Mender 4.2.0: Stronger account security and a refreshed management experience
Discover the latest updates in Hosted Mender 4.2.0, featuring enhanced security, unified login options, and improved device management for IoT solutions.
New in Mender: Introducing support for Yocto 6.0 Wrynose LTS
Mender introduces support for Yocto 6.0 Wrynose LTS, updating components and enhancing compatibility. Discover the latest features and improvements for seamless IoT updates.

An expert Q&A session on the EU Cyber Resilience Act: Industry insights from STMicroelectronics and Northern.tech
Explore expert insights on the EU Cyber Resilience Act, its implications for IoT products, and essential compliance strategies from industry leaders.
Learn why leading companies choose Mender
Discover how Mender empowers both you and your customers with secure and reliable over-the-air updates for IoT devices. Focus on your product, and benefit from specialized OTA expertise and best practices.